Here’s a tutorial for a plush elephant. It requires just a basic level of sewing skills (it’s recommended you use a machine for most of it), and can be made out of repurposed materials — old sweatshirts, sweaters, flannel shirts, upholstery fabric, anything that has some sturdiness to it.

You’ll need to choose two main fabrics: Fabric A, for the main body, Fabric B, for the underbelly. Avoid anything sheer, flimsy, or too stiff — you want something durable, flexible, and soft.
You can find the pattern pieces for download (along with these instructions as a tidy little pdf booklet) for $3.00 at Etsy here. If you have any questions, just write to razblint(at)gmail(dot)com.
Here we go!
The materials you need:
Fabric A, 1/2 yard
Fabric B, 1/4 yard
Felt squares: 1 white, 1 Green, 1 Blue, 1 Purple, 1 Red
Polyfiber stuffing
Part 1: CUT
Cut the pattern pieces from the downloaded sheets (and if you then trace & cut them from a light stiff cardboard, like a cereal box, then they will be easier to use).
")
Cut 2 Body Pieces from Fabric A
")
Cut 1-on-fold Underbelly Piece from Fabric B
")
Cut 2 Ear Pieces from Fabric A
")
Cut 2 Ear Pieces from Fabric B
")
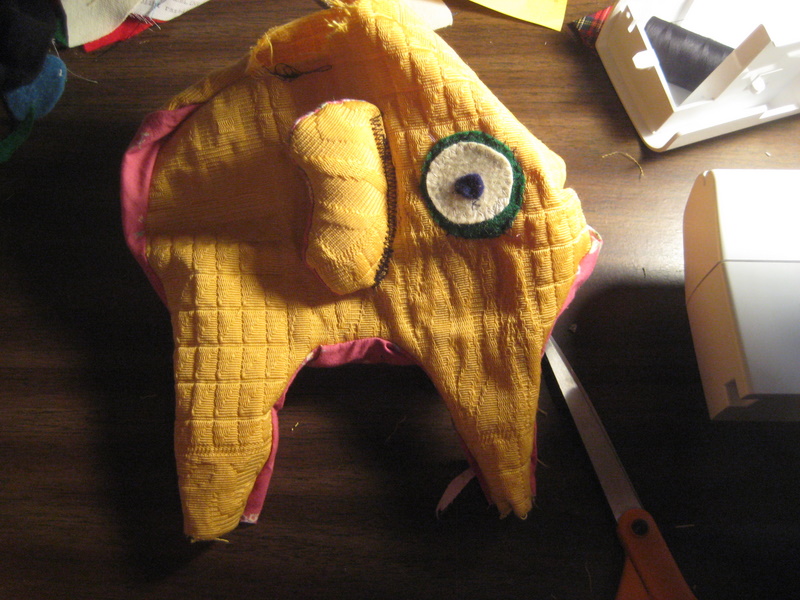
Cut 2 Eye Pieces from White Felt
")
Cut 2 Eye Shadow Pieces from Green Felt
Cut 2 Eye Balls from Blue Felt
Cut 4 Paws from Purple Felt
")
Cut 1 Snout from Red Felt
Part 2: APPLIQUE
Sew Eyeball onto Eyepiece, repeat
Sew Eyepiece onto Eye Shadow piece, repeat
")
Sew Eye onto Body Piece, as marked, repeat for other set
")
Part 3: EARS
Sew One Fabric A Ear Piece to One Fabric B Piece, from point X to point Y. repeat
")
Turn the ears right side out
")
Stuff them until they are plump
")
Turn the raw edges in, pin them close
Sew along pins
")
Stitch the ears to the body piece, on the marked line, using an overcast stitch if possible
")
Part 4: BODY
Sew one Body piece to the Underbelly piece, from point A to B, then from C to D, then E to F (Be sure to leave gaps at the leg openings!). Repeat for other Body piece and second half of Underbelly
")
")
")
Sew two Body pieces together, from point J to K – leave a gap, and then from N to O
")
Part 5: STUFF & FINISH!
Turn your elephant right side out through the gap along its top
")
")
")
Stuff it plump – paying special attention to making the legs stiff enough to stand up straight
")
")
Handsew one paw to one leg, repeat for remaining three
")
Handsew snout to the trunk
")
Handsew the gap along the top closed
")
And there you are: ELEPHANT!
")